2, technical parameters
|
Name |
Specification |
|
Rated power AC |
AC 220V / 50Hz |
|
Rated power |
450W |
|
Working condition |
Can work continuously |
|
Working environment |
-10℃~40℃ |
|
Working environment humidity |
≤90% |
|
Dimensions |
620mm X520mm X 450mm |
|
Machine weight |
35kg |
Third, equipment display and operating instructions
1, boot
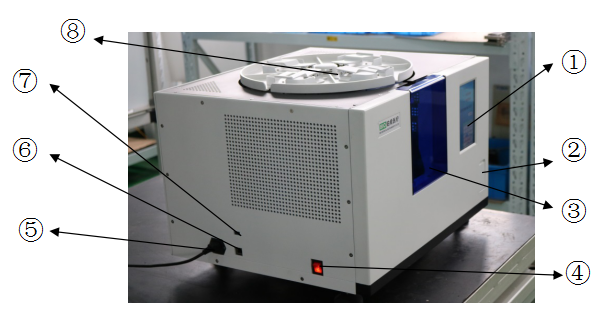
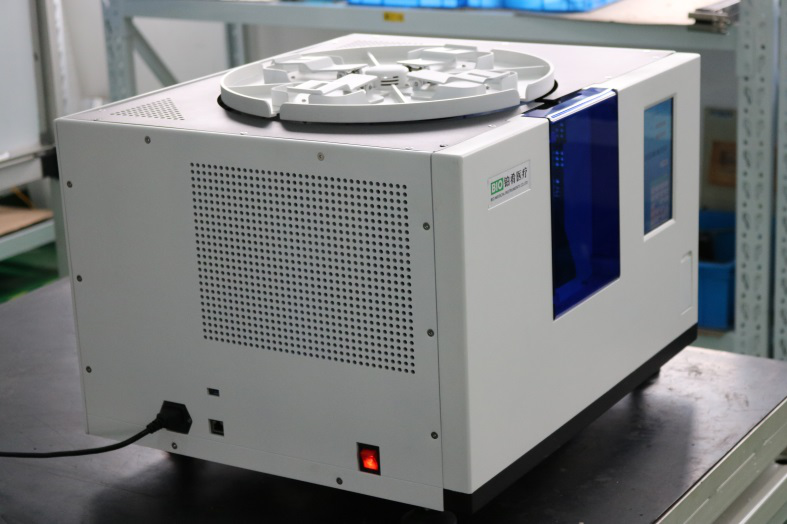
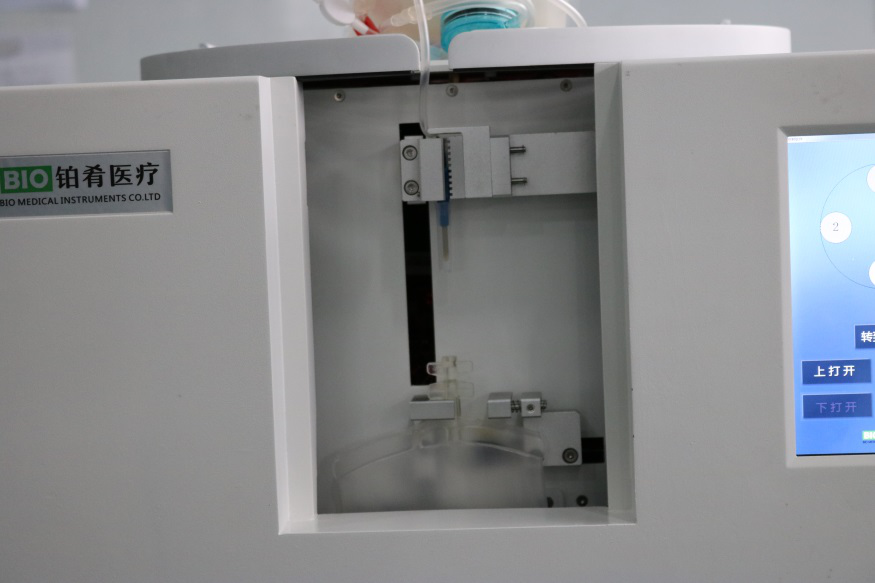
Place the product on the decontamination table, connect the power cord to the power jack on the left side of the product, insert the codec into the USB port, connect the network cable to the network cable port and press the left power button.
Figure 2 boot
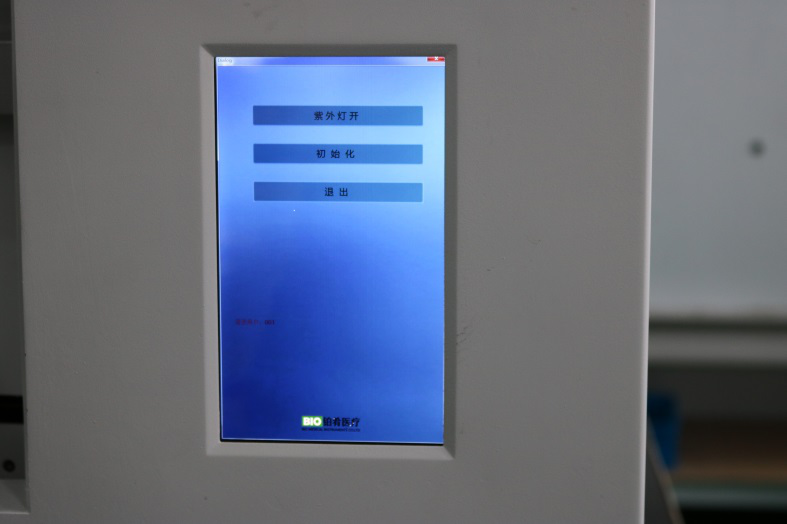
2, boot interface
Figure 3 boot login screen
3, login
After powering on, as shown in Figure 3, the computer displays the login interface at the upper right of the front of the product. After logging in for the first time, you need to register the user information, enter the administrator information, set the administrator user name and password, and then set the administrator mode and management Member open user settings Enter the user name and password, add, delete, modify other user information.
The operator will enter the user name and password, touch-click login.
4, UV lamp disinfection
Click login, enter initialization interface as follows:
Figure 4 Initialization interface
Click "UV lamp open", the product inside the UV light to open. UV light irradiation disinfection will be automatically shut down after 5 minutes, while the folder closed, the internal turntable low-speed rotation.
Note: During UV lamp irradiation, do not open the blue glass cover, do not touch the top of the product turntable, the operator leaves the product more than 1m distance to prevent leakage of UV reflection.
5, initialization
UV disinfection is completed, remove the blue glass cover, open the right needle cap leakage port, as shown in Figure 5:
Figure 5 Pre-initialization state
Click the "initialization" button, the product automatically enter the initialization operation.
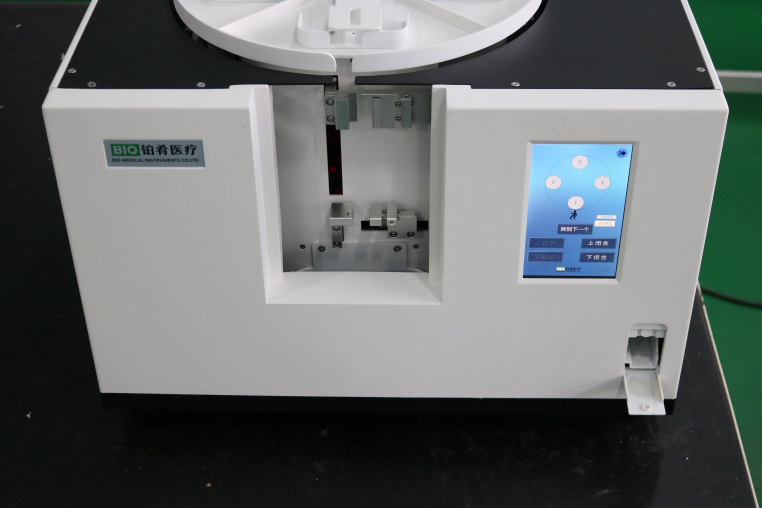
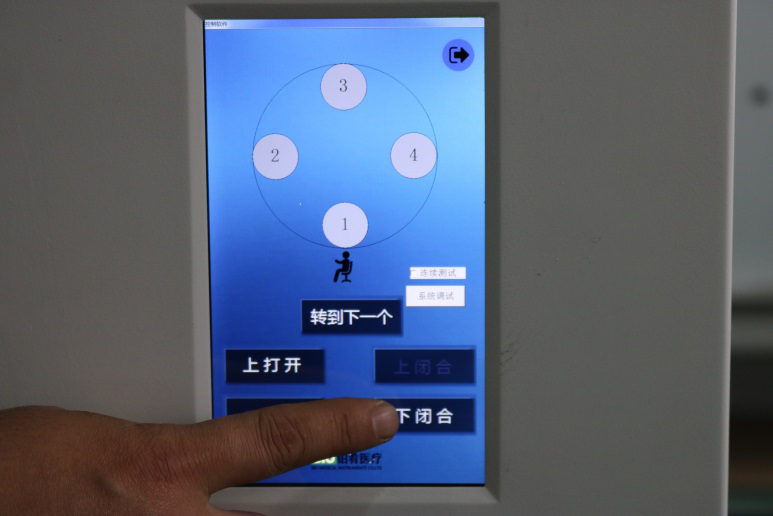
66, user interface
Click the "Initialize" button, the interface into the user interface, as shown in Figure 6:
Figure 6 during the initialization process
At this point the button can not be operated, wait for the product to be automatically initialized before operation.
Attention: During the initialization process, the movement of the internal body of the product and the rotation of the turntable will be normal. At this time, operators should not touch the internal components of the turntable and other products to avoid damage to the machine and personnel.
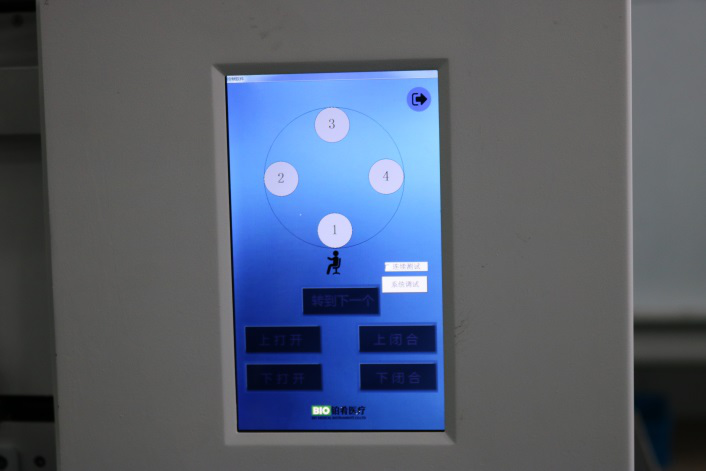
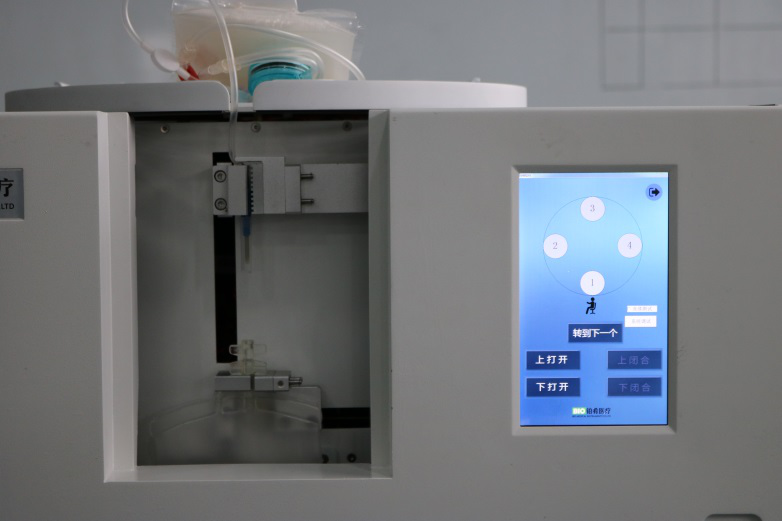
After initialization, the interface shown in Figure 7:
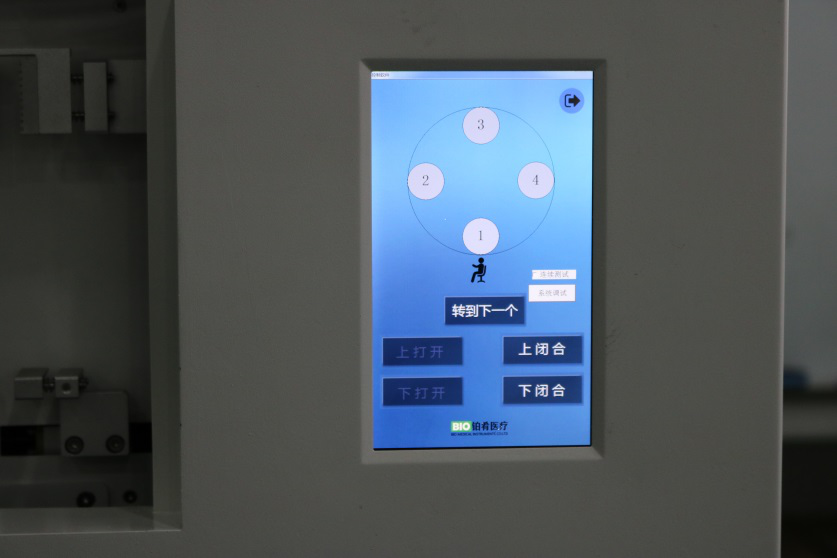
Figure 7 user interface
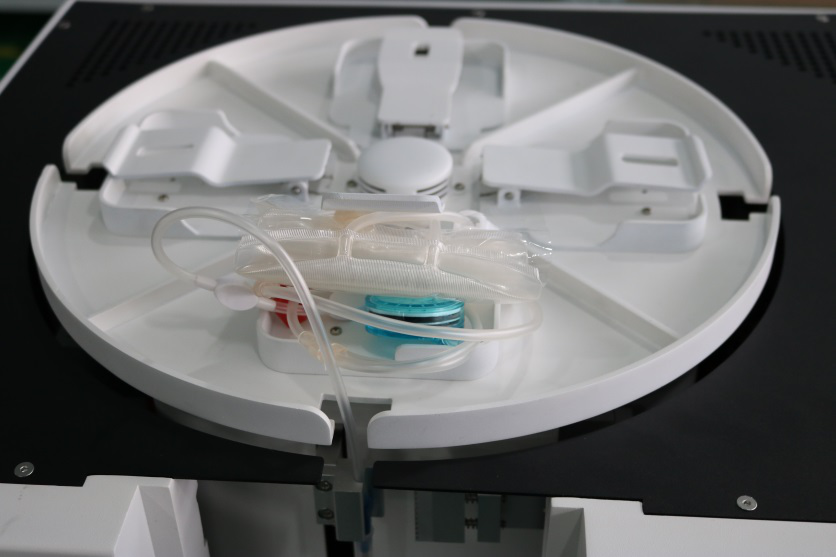
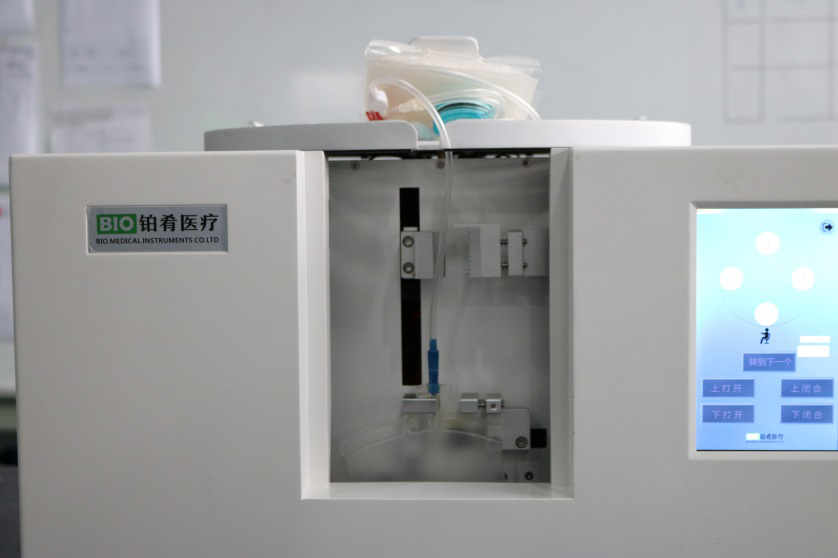
Internal turntable product alignment, shown in Figure 8:
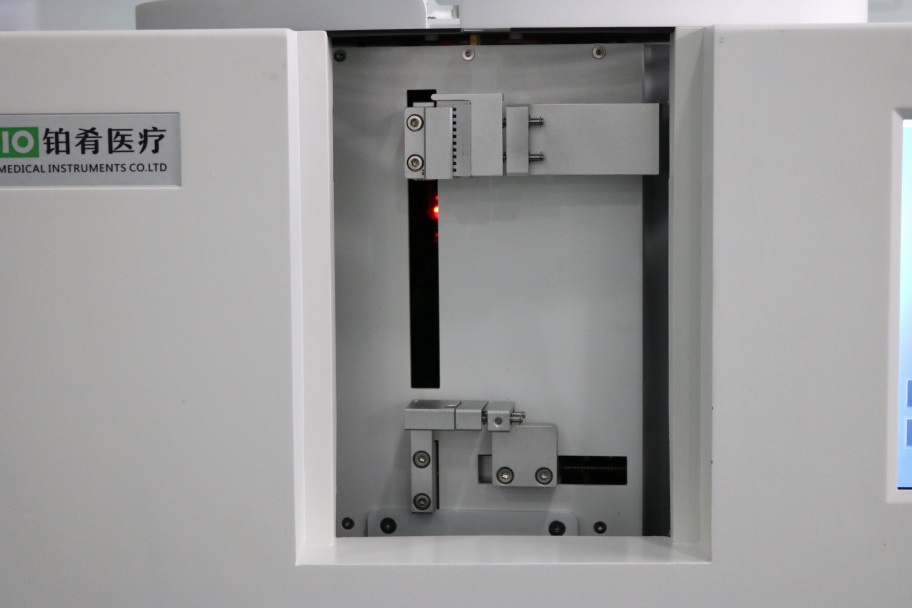
Figure 8 turntable position
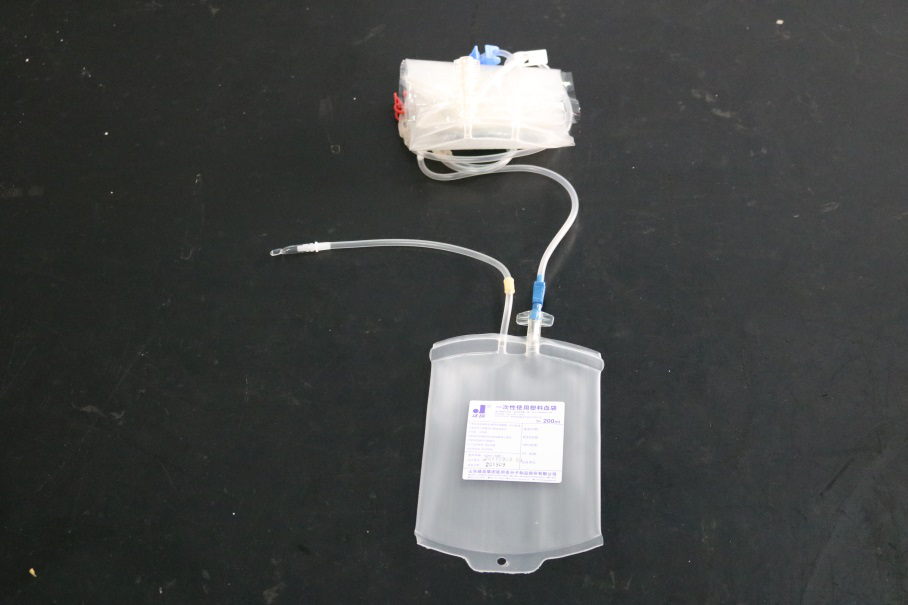
7, into the inactivated bag and plasma bag
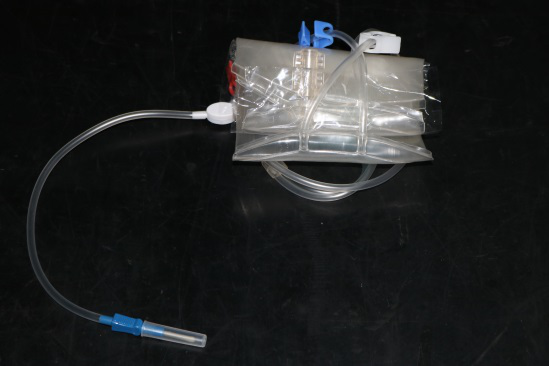
Inactivated bags and plasma bags shown in Figure 9:
Figure 9 inactivated bag and plasma bag
Winding the inactivated bag to the condition as shown in Figure 9, opening the top turntable clip of the product, putting it in the inactivation bag and closing the clip, as shown in Figure 10:
Figure 10 inactivated bags into the tray
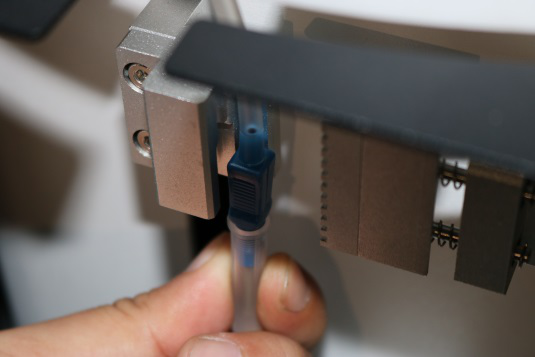
Will inactivated bag needle fixed card stuck in the left hand groove, as shown in Figure 11:
Figure 11 needle fixed
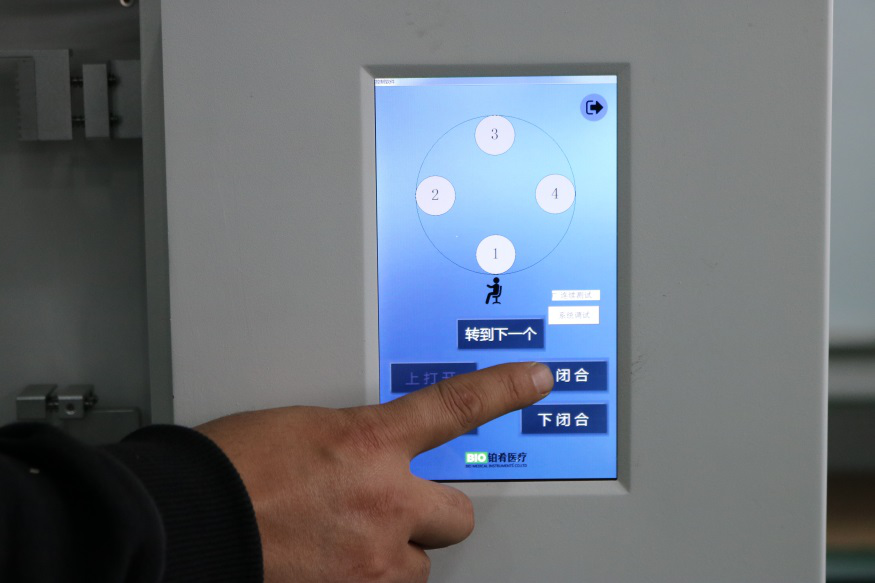
As shown in Figure 12, click on the interface "on the closed", the upper folder automatically closed, closed as shown in Figure 12:
Figure 12 Click on the "closed"
Use the hand-held scanner to scan the barcode on the plasma bag, place the plasma bag in the slot under the clip, and insert the piercing cap into the slot in the clip, as shown in Figure 13:
Figure 13 Close the upper hand grip and place in the plasma bag
Click on the "closed" under the folder automatically closed, as shown in Figure 14:
Figure 14 closed under the folder
Note: Needle placed in the upper hand groove, the need to rely on tight groove alignment; plasma bag puncture the bottom edge of the hat should be close to the plane under the folder.
8, "go to the next one"
Click the "Go to Next" button, the turntable will automatically move to the next station, repeat the process "7" into the deactivation bag and plasma bag, then repeat the process "8".
9, remove the puncture good inactivated bags and plasma bags
The first plasma bag and inactivated bag into the bag after cutting, pulling cap, puncture process, returned to the operator station, has been automatically punctured, as shown in Figure 15:
Figure 15 puncture after taking over the product status
Remove the punctured take-off deactivation bag and plasma bag, as shown in Figure 16, and repeat "Process 7, 8, 9" until completion of the required puncture takeover task.
Figure 16 After the puncture took over the inactivation bag and plasma bag
Fourth, other instructions
1, product packaging
After receiving the equipment, please carefully open the package, and carefully check the machine for any damage, such as found during transport damage, please notify me or your local dealer.
2, environmental requirements
Equipment must be placed on a level solid panel and should not be significantly tilted to either side. The use of environmental conditions to comply with the provisions of this manual. The machine can not be placed in the environment of flammable and explosive dangerous goods, there must be fire prevention facilities around.
3, transport
Heavy machine, the application of flatbed handling. Machine handling, the maximum body inclination can not exceed 15 degrees, but can not be inverted or horizontal handling. In the transport process, to prevent bump and intense vibration, rain and water immersion.
4, the power connection
The working power of the machine is 220V / 50Hz, plug the socket end of the power cord into the power socket on the back of the machine, plug the power cord into the power socket, and the machine can work. (Note: the power outlet grounding must be grounded)
5, maintenance and cleaning
Machine platform and accessories can be neutral detergent or anhydrous alcohol scrub. When servicing the machine, the machine should be thoroughly sanitized and disinfected to prevent harmful or infectious substances from endangering the health of the service personnel.
Five, troubleshooting table
|
Symptoms |
Failure reason analysis |
Solution |
|
Can not boot |
1, the power outlet is damaged
2, the power cord is damaged
3, fuse blown |
1, for the power outlet
2, for the power cord
3, for the fuse (with a spare fuse) |
|
Unable to cut off the plasma bag cap |
Blade aging, wear and tear |
1, the system automatically detects not cut off, the next step manually into the plasma bag operation, close the upper and lower chuck, directly into the next, to exit the uncut plasma bag.
2, replace the blade |
|
Unable to remove the needle cap |
Worn hands, aging |
1, the system automatically detects the needle cap is not removed, the next step is not manually into the plasma bag operation, close the upper and lower collet directly into the next, exit the needle cap is not pulled out.
2, maintenance pin hatched hands, replace the aging parts |
Note: If you take the above measures can not solve the problem, please contact our after-sales service department in time.


 English
 Chinese